Achieve Stunning Hardwood Floors: Step-by-Step Guide to Staining and Finishing
Table of Contents:
- Introduction
- Staining Hardwood Floors
- Choosing the Right Stain
- Preparing the Floors
- Applying the Stain
- Removing Tacky Spots
- Understanding Polyurethane
- Types of Polyurethane
- Water-Based vs. Oil-Based Polyurethane
- The Issue with Yellowing
- The Trick to Using Water-Based Polyurethane
- Introducing Minwax Ultimate Floor Finish
- Advantages of Matte Finish
- Non-Ambering Polyurethane
- Preparing for Polyurethane Application
- Using Mineral Spirits
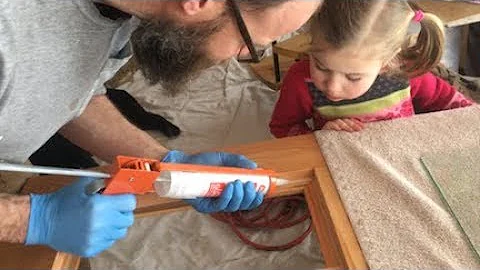
- Essential Tools and Materials
- Cleaning the Feet and Wearing Gloves
- Applying Water-Based Polyurethane
- Evenly Coating the Floors
- Dealing with Tacky Spots
- Using an Old Shirt for Application
- Final Touches and Maintenance
- Using a Tack Cloth
- Tips for a Clean Finish
- Maintenance of Polyurethane-Coated Floors
- Conclusion
Staining and Finishing Hardwood Floors: A Step-by-Step Guide 😄
Hardwood floors can lend timeless beauty and warmth to any home. If you're looking to enhance the natural charm of your floors, staining and finishing them can be a great approach. In this article, we will guide you through the process of achieving stunning hardwood floors that exude a rustic yet elegant appeal.
1. Introduction
Whether you're renovating an old home or simply looking for a way to refresh your living space, stained hardwood floors can provide a stunning transformation. In this comprehensive guide, we will walk you through the process of staining and finishing your hardwood floors to bring out their natural beauty.
2. Staining Hardwood Floors
2.1 Choosing the Right Stain
Before diving into the staining process, it's crucial to select the right stain color for your floors. Consider the overall aesthetic of your home and the desired effect you wish to achieve. From light to dark shades, there are endless options available.
2.2 Preparing the Floors
Preparing the floors is an important step to ensure a successful staining process. This involves removing any baseboards and thoroughly cleaning the floors to eliminate dirt, dust, and oils that may hinder the absorption of the stain.
2.3 Applying the Stain
Once the floors are prepped, it's time to apply the stain. Using a high-quality wood stain and an applicator, evenly coat the floors with the chosen stain. Take care to work in small sections and maintain a consistent application technique for a uniform finish.
2.4 Removing Tacky Spots
After staining, it's essential to check for any tacky spots. If there are any areas that feel sticky or tacky to the touch, they must be addressed before proceeding to the next step. Failure to do so can result in a compromised adhesion of the protective polyurethane layer.
3. Understanding Polyurethane
Polyurethane serves as a protective coating that adds durability and longevity to your stained hardwood floors. Understanding the different types of polyurethane and their characteristics is crucial to achieving the desired results.
3.1 Types of Polyurethane
When it comes to polyurethane, two primary types are available - water-based and oil-based. Each type offers its own advantages and considerations.
3.2 Water-Based vs. Oil-Based Polyurethane
It's important to note that water and oil do not mix. Consequently, when applying polyurethane over oil-based stains, compatibility is a key factor to consider. Water-based polyurethane provides a safer option for use over oil-based stains, with excellent durability and adhesion properties.
3.3 The Issue with Yellowing
One common concern with oil-based polyurethane is its tendency to yellow over time. This yellowing effect can significantly alter the appearance of your floors and may not be desirable. To maintain the natural look of your stained floors, it's crucial to explore alternative options.
4. The Trick to Using Water-Based Polyurethane
To overcome the yellowing issue associated with oil-based polyurethane while ensuring adequate durability, a solution comes in the form of Minwax Ultimate Floor Finish.
4.1 Introducing Minwax Ultimate Floor Finish
Minwax Ultimate Floor Finish provides a water-based polyurethane that offers exceptional durability without compromising on appearance. This product comes in a matte finish, making it ideal for those who prefer a subtle and natural look for their floors.
4.2 Advantages of Matte Finish
The matte finish of Minwax Ultimate Floor Finish eliminates any sheen or glare from your floors, giving them the authentic appearance of barn wood floors. With its non-reflective nature, this finish ensures that your floors remain elegant and understated.
4.3 Non-Ambering Polyurethane
Unlike traditional oil-based polyurethane, Minwax Ultimate Floor Finish is non-ambering. This means that it does not contain any additives that cause yellowing over time. Your floors will maintain their original beauty, unaffected by age, sunlight, or other environmental factors.
5. Preparing for Polyurethane Application
Before applying the water-based polyurethane, a few preparations are necessary to ensure a successful and seamless process.
5.1 Using Mineral Spirits
To enhance the adherence of the water-based polyurethane, it is recommended to use mineral spirits or paint thinner. These substances help remove any residual oils or contaminants, allowing for better bonding between the stain and the protective coating.
5.2 Essential Tools and Materials
To apply the polyurethane, gather essential tools such as a clean shirt or cloth for application, mineral spirits, disposable gloves, and a tack cloth. Ensure that your feet are clean and covered with clean socks to minimize the chance of dust particles getting tracked onto your stained floors.
5.3 Cleaning the Feet and Wearing Gloves
Before starting the application process, clean your feet and put on gloves. This will prevent any oils or dirt on your hands or feet from transferring onto the newly stained surfaces, ensuring a pristine finish.
6. Applying Water-Based Polyurethane
Now that the preparations are complete, it's time to apply the water-based polyurethane onto the stained floors.
6.1 Evenly Coating the Floors
Using a clean shirt or cloth, apply the water-based polyurethane evenly across the stained floors. Work in small sections and ensure a consistent application to achieve a smooth and professional finish.
6.2 Dealing with Tacky Spots
While working with the water-based polyurethane, it's important to address any tacky spots on the floor. If you encounter any sections that feel sticky or tacky, carefully remove the excess polyurethane to prevent issues with adhesion in the future.
6.3 Using an Old Shirt for Application
For the application of the water-based polyurethane, using an old shirt rather than a rag is recommended. Rags tend to leave behind lint and fuzzies, which can mar the final finish. The loan-out nature of a shirt ensures a clean and flawless application.
7. Final Touches and Maintenance
Once the water-based polyurethane is evenly applied, there are a few final touches and maintenance tips to keep in mind.
7.1 Using a Tack Cloth
After the application, use a tack cloth to remove any remaining dust or particles that may have settled on the surface. This ensures a smooth and pristine finish for your stained hardwood floors.
7.2 Tips for a Clean Finish
To maintain the beauty of your stained floors, follow basic maintenance tips such as regular sweeping, avoiding abrasive cleaners, and promptly cleaning up spills or stains. This will ensure the longevity and vibrancy of your newly finished floors.
7.3 Maintenance of Polyurethane-Coated Floors
With polyurethane-coated floors, maintenance is relatively simple. Regular cleaning using a mild cleaner and a soft mop is sufficient to keep them looking their best. Additionally, occasional reapplication of water-based polyurethane will help maintain their protective properties.
8. Conclusion
In conclusion, staining and finishing your hardwood floors can transform the ambiance of your home, adding elegance and charm. By understanding the process and choosing appropriate products, you can achieve stunning results that will stand the test of time. Embrace the natural beauty of your hardwood floors and embark on this rewarding journey to create a space you'll love for years to come.
Highlights:
- Discover the step-by-step process of staining and finishing your hardwood floors
- Understand the difference between water-based and oil-based polyurethane
- Learn how to achieve a non-ambering and matte finish for your floors
- Get valuable tips on preparing, applying, and maintaining polyurethane coatings
- Create a timeless and elegant ambiance with stained hardwood floors
FAQs:
Q: Can I use water-based polyurethane over oil-based stain?
A: It is generally not recommended, as water and oil do not mix well. However, there are alternative options available, such as Minwax Ultimate Floor Finish, which allows for the use of water-based polyurethane over oil-based stain.
Q: How often do I need to reapply polyurethane on my hardwood floors?
A: The frequency of reapplication depends on the level of foot traffic and wear and tear your floors experience. As a general guideline, it is advisable to reapply water-based polyurethane every 3-5 years to maintain its protective properties.
Q: Can I use a rag instead of a shirt for applying polyurethane?
A: While you can use a rag, it is recommended to use an old shirt instead to avoid leaving behind lint or fuzzies that may affect the final finish of your floors.
Resources: