Diagnose and Fix Sprinkler System Zone Issues Using a Voltmeter
Table of Contents
- Introduction
- Troubleshooting a Zone that Won't Stop Running
- Troubleshooting a Zone That Isn't Coming on All the Way
- Troubleshooting a Zone That Won't Come on at All
- Testing the Controller and Solenoid
- Checking the Wiring
- Replacing the Valve
- Running New Wire
- Using a Doubler
- Conclusion
Introduction
Have you ever faced issues with your sprinkler system where one zone isn't coming on or isn't shutting off while the rest of the system is working fine? There could be several reasons behind this, including problems with the valve, controller, or wiring. But how do you determine which component is causing the issue? In this article, we will guide you through the troubleshooting process using a volt meter to diagnose and fix the malfunctioning zone in your sprinkler system.
Troubleshooting a Zone that Won't Stop Running
🔎 Problem: The sprinklers in a zone are on even when they should not be, or water continues to dribble from the heads even after the zone has shut off.
If you're facing this issue, it is highly likely that the problem lies with the valve rather than the controller. When a zone won't stop running, it indicates that the valve is not closing all the way. To fix this, you will need to find and replace the faulty valve.
Troubleshooting a Zone That Isn't Coming on All the Way
🔎 Problem: The sprinkler heads in a zone are not popping up or functioning properly.
When you encounter this problem, with the heads not fully coming on or water seeping from the top of some heads, it indicates that the valve is not opening all the way. In such cases, you will need to find and replace the valve to ensure proper functioning of the zone.
Troubleshooting a Zone That Won't Come on at All
🔎 Problem: One zone in your sprinkler system is not turning on at all.
Diagnosing a zone that won't come on at all is more challenging as it could have various causes. Firstly, check if the module in the controller is properly inserted and locked into place, especially if you have a modular controller. Additionally, ensure that there are no programming errors and that the zone is scheduled to run. If the controller indicates that the zone should be running but the sprinklers are not coming on, the problem could be with the controller itself, the wiring between the controller and the valve, or the solenoid on the valve. Further electrical troubleshooting is required to pinpoint the issue.
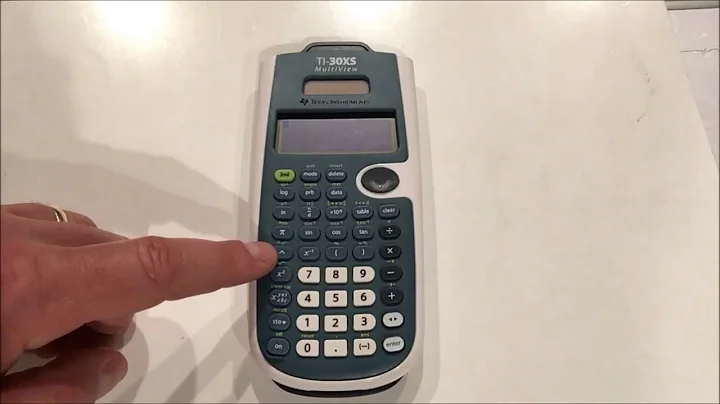
Testing the Controller and Solenoid
To determine whether the controller is functioning properly, you can use a multimeter set to test for around 24 volts AC. Set the controller to run the problem zone and place the black probe on the common terminal and the red probe on the zone that's supposed to be running. A reading of 20-30 volts indicates that the controller is working correctly.
If the controller's reading is too low or if you have a modular controller and suspect a faulty module, consider replacing the module or switching the wire to a spare terminal if available. In case these steps do not resolve the issue, you will likely need to replace the entire controller.
Checking the Wiring
If the controller checks out fine, but the problem persists, the next step is to check the wiring. Set the multimeter to measure resistance and touch the probes to the common terminal and the terminal of the zone you're testing. The resistance should fall between 20 and 60 ohms, depending on the brand and model of the valve. If the resistance is too low or you get a reading of 1 or "OL," it indicates a broken wire, unconnected wire, or a bad solenoid.
Replacing the Valve
If the solenoid tests positive for good resistance, then the issue is likely with the valve itself. At this point, you'll need to locate your valve box and unhook the wires from the solenoid. Using the multimeter set to test resistance, touch the wires coming from the solenoid with the probes. If the reading falls outside the range of 20 to 60 ohms, it confirms a faulty valve.
In such cases, it is advisable to replace the valve entirely since individual solenoids can often cost nearly as much as a new valve. By installing a new valve, you not only fix the current issue but also ensure the longevity and proper functioning of the entire valve box for years to come.
Running New Wire
If the solenoid and valve are not the cause of the issue, the next possibility is a wiring problem. Set the controller to run the problem zone and use the multimeter to check for around 24 volts AC. Touch or wrap the wires leading to the solenoid with the probes and look for a reading of 20 to 30 volts. If the reading is low or close to zero, it indicates faulty wiring.
Check if any wire connectors have come off or if there are spots where the wire has become corroded at the wire connector. Repairing or replacing the damaged wiring should solve the issue. Running new wire is a labor-intensive task, so consider this option if all other troubleshooting steps have been exhausted.
Using a Doubler
If running new wire is not feasible, another option is to use a doubler. A doubler allows you to operate two valves using only one lead wire. This can be a viable solution, especially if there is another valve nearby in the same valve box. By utilizing a doubler, you can overcome the wiring limitations and ensure that both zones operate efficiently.
Conclusion
In conclusion, troubleshooting a malfunctioning zone in your sprinkler system requires a systematic approach to identify and resolve the underlying issue. Start by diagnosing whether the problem lies with the valve, controller, or wiring, and then perform the necessary steps to rectify the problem. Remember to refer to the manufacturer's guidelines and seek assistance from professionals if required. With the right troubleshooting techniques, you can ensure the optimal performance of your sprinkler system and maintain a healthy landscape.
Highlights
- Isolating the cause of a malfunctioning zone in a sprinkler system requires troubleshooting the valve, controller, and wiring.
- If a zone won't stop running, it is likely a valve issue that needs to be replaced.
- Zones that aren't coming on all the way may indicate a valve not opening fully, necessitating a valve replacement.
- When a zone won't come on at all, start by checking the controller, wiring, and solenoid.
- Testing the controller and solenoid with a multimeter can help identify potential issues.
- Faulty wiring can be the cause behind a zone not functioning properly, requiring repairs or replacement.
- When all else fails, running new wire or using a doubler can provide alternative solutions.
- Regular maintenance and periodic inspections can prevent future issues with sprinkler system zones.
- Upgrading to a smart controller can enhance the overall efficiency and convenience of your sprinkler system.
- Seek professional assistance or consult with experts for complex troubleshooting or replacement tasks.