Expert Guide: Partially Rebuilding a Carburetor for Optimal Engine Performance
Table of Contents
- Introduction
- Understanding Carburetors
- Common Problems with Cube Type Carburetors
- Fuel Pump Diaphragm
- Metering Diaphragm
- Tools Required for Partial Rebuild
- Labatt Blue Beer
- Phillips Screwdriver
- Carburetor Repair Kit
- Step-by-Step Guide to Partially Rebuild a Carburetor
- Removing the Metering Diaphragm
- Inspecting and Replacing the Metering Diaphragm
- Removing the Fuel Pump Diaphragm
- Inspecting and Replacing the Fuel Pump Diaphragm
- Tips for Proper Carburetor Setup
- Conclusion
How to Partially Rebuild a Carburetor: A Step-by-Step Guide
Carburetors play an essential role in the functioning of small engines by accurately mixing gasoline and air to ensure optimal performance. However, over time, carburetors can develop issues that affect their performance. While a complete rebuild of a carburetor may seem daunting, it is often unnecessary. In this guide, we will focus on two common problems in cube type carburetors and provide a step-by-step process to partially rebuild them, addressing the most frequent issues.
Introduction
Welcome back to Steve Small Engine Saloon! Today, I am going to show you how to partially rebuild a cube type carburetor. This tutorial will focus on fixing the two most common problems that can hinder the performance of your carburetor. By following the steps outlined in this guide, you will be able to address these issues and get your engine running smoothly again.
Understanding Carburetors
To truly comprehend the importance of carburetor maintenance, let's briefly delve into how they work. A carburetor is responsible for blending the right amount of gasoline and air in the proper ratio, which is then injected into the engine for combustion. This ensures that the engine runs efficiently and performs optimally.
Common Problems with Cube Type Carburetors
Before we dive into the rebuilding process, let's take a look at the two common problems that plague cube type carburetors: the fuel pump diaphragm and the metering diaphragm.
Fuel Pump Diaphragm
The fuel pump diaphragm is located on one side of the carburetor and is responsible for pumping fuel into the engine. Over time, it can become worn or damaged, causing fuel delivery issues.
Metering Diaphragm
The metering diaphragm, on the other hand, regulates the amount of fuel that enters the engine. If this diaphragm is damaged or deteriorated, it can lead to improper fuel mixture, resulting in poor engine performance.
Tools Required for Partial Rebuild
Before we begin the rebuilding process, let's gather the necessary tools for the job. You will need:
- Labatt Blue beer (or any beer of your choice)
- Phillips screwdriver
- Carburetor repair kit (specifically RB 100 repair kit for Zama carburetors)
Step-by-Step Guide to Partially Rebuild a Carburetor
-
Removing the Metering Diaphragm:
- Locate the side of the carburetor with the primer bulb and use a Phillips screwdriver to remove the four screws that hold the primer body in place.
- Once the screws are removed, the primer body should come off easily.
- Inside the carburetor, you will find the metering diaphragm. Identify it by the silver disc attached to it.
- Gently remove the metering diaphragm, along with the gasket, ensuring you do not damage them.
Tip: A healthy metering diaphragm should be soft and supple. Flexing it between your fingers should feel smooth and easy. If it feels stiff or crinkly, it needs to be replaced.
-
Inspecting and Replacing the Metering Diaphragm:
- Open your carburetor repair kit and locate the new gasket.
- Attach the gasket to the carburetor, aligning the hole in the gasket with the corresponding hole in the carburetor.
- Place the metering diaphragm on top of the gasket, ensuring that the silver disc is facing down into the carburetor.
- Reattach the primer body, aligning it correctly, and secure it with the four screws.
-
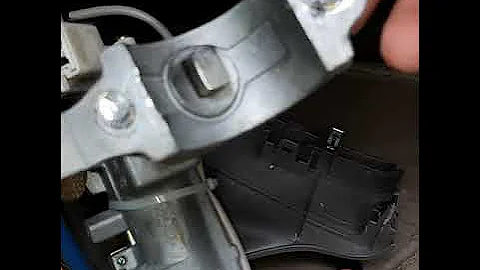
Removing the Fuel Pump Diaphragm:
- Locate the side of the carburetor opposite the primer bulb.
- Use a Phillips screwdriver to remove the screw holding the fuel pump diaphragm in place.
- Carefully remove the diaphragm and inspect it for any signs of damage.
Tip: Check the screen under the fuel pump diaphragm for debris and clean it if necessary.
-
Inspecting and Replacing the Fuel Pump Diaphragm:
- Attach the new fuel pump diaphragm to the carburetor, making sure the flappers are facing down and properly aligned with the carburetor.
- Secure the diaphragm in place with the screw.
-
Tips for Proper Carburetor Setup:
- Once you have reassembled your carburetor, it is essential to adjust it correctly. Visit our channel for tutorials on carburetor adjustment for chainsaws, weed eaters, or blowers.
-
Conclusion
Rebuilding a carburetor may seem daunting, but addressing the most common issues can significantly improve its performance. By following this guide and focusing on the fuel pump diaphragm and metering diaphragm, you can restore your carburetor to its optimal state and ensure your small engine runs smoothly.
Remember, if you found this guide helpful, give it a thumbs up and subscribe to our channel for more valuable tips and tutorials. Until next time, happy rebuilding!
Pros:
- Provides step-by-step instructions for partial rebuilding of cube type carburetors
- Explanation of the importance of carburetor maintenance
- Highlights common problems and their causes
- Offers tips for proper carburetor setup
Cons:
- Does not address all potential carburetor issues
- Assumes a basic understanding of small engine components
Highlights
- Rebuilding a carburetor is often unnecessary; partial rebuilding can effectively address common issues.
- The fuel pump diaphragm and metering diaphragm are the most common problems in cube type carburetors.
- Labatt Blue beer, a Phillips screwdriver, and a carburetor repair kit are the tools needed for partial rebuilding.
- The step-by-step process involves removing and inspecting the diaphragms, replacing them if necessary, and reassembling the carburetor.
- Proper carburetor setup is crucial for optimal performance.
FAQ
Q: How do I know if my carburetor needs to be partially rebuilt?
A: If your small engine is experiencing issues with fuel delivery or if the fuel mixture is incorrect, a partial rebuild can often resolve these problems.
Q: Can I use a different repair kit for my carburetor?
A: It is recommended to use the specified repair kit for your carburetor model to ensure compatibility and proper replacement parts.
Q: How often should I perform a partial rebuild on my carburetor?
A: The frequency of partial rebuilding depends on the usage and maintenance of your small engine. Regular inspection and cleaning can help prevent major issues that require a rebuild.
Q: Can I skip the step of adjusting the carburetor after rebuilding?
A: No, carburetor adjustment is crucial for optimal performance and should be done after every rebuild or significant maintenance.
Q: Can I use any type of beer for the job?
A: Any beer will work for this particular task, including Labatt Blue. However, it is not necessary for the actual rebuilding process.
Q: Are there any risks involved in partially rebuilding a carburetor?
A: As long as you follow the instructions carefully and take necessary precautions, there should be minimal risks involved.