Master CFM56-7B Fan Blade Removal Procedure
Table of Contents
- Introduction
- Technical Documentation
- 2.1 CFM56-7B Engine Maintenance Manual
- 2.2 Engine Shop Manual ATA Chapter 72-21-00
- Removal Procedure
- 3.1 Removal of Spinner Cones
- 3.2 Removal of Retaining Rings
- 3.3 Removal of Fan Blades
- Alternate Tooling Options
- Blade Identification and Numbering
- Preparation for Blade Removal
- 6.1 Applying Vaseline
- 6.2 Spacer Removal
- 6.3 Lubricating Platform Seats
- 6.4 Using Blade Puller
- Platform Removal
- 7.1 Using Puller for Platform Removal
- 7.2 Disengaging the Platform
- 7.3 Removing Fan Blade
- 7.4 Changing a Pair of Fan Blades
- 7.5 Changing the Complete Set of Blades
- Platform Lubrication and Parts Preparation
- Blade Installation Procedure
- 9.1 Sorting and Mapping Distribution
- 9.2 Lubrication of Blades and Platforms
- 9.3 Installing Fan Blades
- 9.4 Installing Platforms and Spacers
- 9.5 Final Blade and Spacer Installation
- 9.6 Installing Retaining Ring
- Spinner Cone Installation
- 10.1 Spinner Rear Cone Installation
- 10.2 Spinner Front Cone Installation
- Conclusion
🚀 CFM56-7B Fan Blade Removal Procedure
The CFM56-7B fan blade removal process is an important aspect of engine maintenance and requires proper procedures to ensure safe execution. This article will take you through the step-by-step process of removing spinner cones, retaining rings, and fan blades from the CFM56-7B engine.
1. Introduction
Maintaining aircraft engines is crucial to ensure their optimal performance and safety. The CFM56-7B engine, commonly used on Boeing 737 aircraft, requires regular maintenance, including the removal and installation of fan blades. In this article, we will focus on the precise procedure for the removal of fan blades from the CFM56-7B engine.
2. Technical Documentation
Before performing any maintenance procedure, it is essential to refer to the relevant technical documentation for comprehensive instructions. In the case of the CFM56-7B engine, the following documents provide detailed guidance:
2.1 CFM56-7B Engine Maintenance Manual
The CFM56-7B Engine Maintenance Manual contains comprehensive instructions and information specific to the CFM56-7B engine. It covers various maintenance procedures, including fan blade removal. Always refer to the latest revision of this manual for accurate guidance.
2.2 Engine Shop Manual ATA Chapter 72-21-00
The Engine Shop Manual ATA Chapter 72-21-00 is another valuable resource for understanding the maintenance procedures for the CFM56-7B engine. It provides additional information and guidance specific to the shop environment. Make sure to consult the latest revision of this manual for up-to-date instructions.
3. Removal Procedure
The removal procedure for fan blades in the CFM56-7B engine involves a series of precise steps. It is essential to follow these steps carefully and adhere to the guidelines provided in the technical documentation. Here's an overview of the removal process:
3.1 Removal of Spinner Cones
To begin the removal process, the spinner cones need to be removed. This step requires careful alignment and positioning of the cones. Follow the instructions in the technical documentation to ensure correct removal.
3.2 Removal of Retaining Rings
After removing the spinner cones, the retaining rings come next. Using the recommended tooling, carefully turn the fan retaining ring until the lugs of the retaining ring are in front of the scallops of the fan disk. This step prepares the fan blades for removal.
3.3 Removal of Fan Blades
Once the retaining rings are correctly positioned, the fan blades can be removed individually. Each fan blade needs to be identified and numbered before removal. Start with blade number 1, which is positioned above the offset hole on the fan disk bolt flange. Apply Vaseline on each side of the blade and the airfoils of the adjacent glaze for lubrication.
Move the blade to the six o'clock position and use a suitable puller to remove the spacers. Lubricate the platform seats and proceed to remove the platform and fan blade from the fan disc slot. Repeat this process for each blade to be removed.
4. Alternate Tooling Options
While the technical documentation recommends specific tooling for fan blade removal, alternate tooling options may be used based on the line capabilities. It is crucial to ensure that the alternate tooling meets the requirements of the removal procedure to maintain safety and accuracy.
5. Blade Identification and Numbering
Proper identification and numbering of fan blades are essential during the removal process. Blade number 1 should be positioned immediately above the offset hole on the fan disk bolt flange. The remaining fan blades should be numbered from 2 to 24 in a counterclockwise direction as seen from the front of the engine.
6. Preparation for Blade Removal
Before removing the fan blades, certain preparations need to be made to ensure a smooth and efficient process. These preparations include applying Vaseline, removing spacers, and lubricating platform seats.
6.1 Applying Vaseline
To facilitate the removal process, apply a bead of Vaseline on each side of the blade and on the airfoils of the two adjacent glazes above the blade platform seals. This helps in reducing friction and easing the movement of the blades during removal.
6.2 Spacer Removal
Using the appropriate tools and techniques, remove the spacers from the blade to be removed, as well as the two adjacent blades. Take caution when removing the spacers to avoid any damage to the surrounding components.
6.3 Lubricating Platform Seats
Lubricate the platform seats to ensure smooth removal and installation. Apply the specified lubricant to the platform seats as per the technical documentation. This step helps in reducing friction and easing the movement of the platforms.
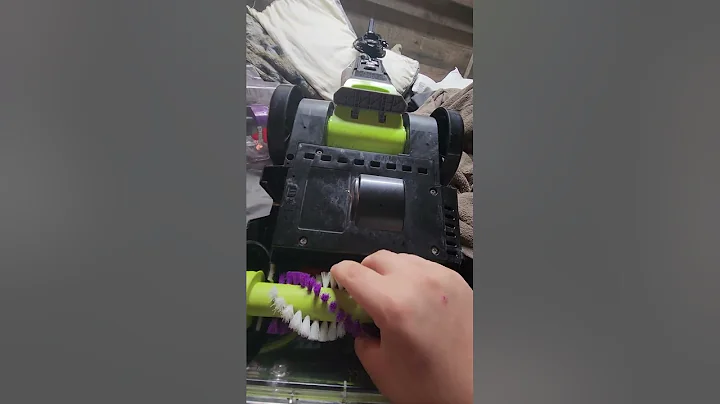
6.4 Using Blade Puller
During blade removal, a suitable puller should be used to ensure safe and efficient extraction. Follow the instructions provided in the technical documentation to use the blade puller correctly. This tool helps in disengaging the blade from the fan disc slot.
Highlight: The removal procedure for CFM56-7B fan blades requires precision and adherence to safety guidelines. Proper identification, preparation, and tooling are crucial for successful removal.
Resources:
7. Platform Removal
The removal of fan blades involves removing the platforms as well. This step requires careful disengagement of the platform from the blade and the fan disc slot. Here is a detailed guide on how to remove the platforms during fan blade removal.
7.1 Using Puller for Platform Removal
To initiate the platform removal process, the appropriate puller must be used. Install the recommended puller on the platform to be removed, ensuring it is securely attached. This puller will aid in the disengagement of the platform from the blade.
7.2 Disengaging the Platform
With the puller in place, lift the rear of the blade root into the slot of the booster spool forward flange. While keeping the rear of the blade root lifted with your hand, use your elbow to push the second blade and pull axially to disengage the platform. Repeat this process for the platform located on the other side of the fan blade to be removed.
7.3 Removing Fan Blade
With the platforms successfully disengaged, the next step is to remove the fan blade from the fan disc slot. Gently pull and remove the fan blade while ensuring it does not get damaged during the process. Take caution and use proper handling techniques to avoid any mishaps.
7.4 Changing a Pair of Fan Blades
In some cases, a pair of fan blades may need to be changed simultaneously. If this is the situation, the previous steps must be repeated for the opposite blade. Ensure that the removal process is carried out with precision and care to maintain engine performance and safety.
7.5 Changing the Complete Set of Blades
When changing the complete set of blades, the removal process should continue in a counterclockwise direction, as seen from the front of the engine. Remove one spacer, one platform, and one blade at a time, following the order specified in the technical documentation. Take note of the position and numbering of each component for accuracy.
Highlight: Removing fan blades requires specific procedures for platform disengagement and proper handling techniques. Careful execution is essential to ensure smooth removal without causing any damage.