Master the Art of Caulking Your RV and Ensure a Leak-Free Journey!
Table of Contents
- Introduction
- Importance of Proper Caulking
- Materials Needed
- Preparing the Surface
- Removing Old Caulk
- Cleaning with Mineral Spirits
- Choosing the Right Caulk
- Using a Drip-Free Caulk Gun
- Applying Caulk to Different Areas
- Exterior Joints and Seams
- Slide-Out Corners
- Furnace Vent Cracks
- Doors and Windows
- Top of Slide-Outs
- Fastener Heads
- Other Seams
- Inspecting and Maintaining Caulk
- Conclusion
🔍 Importance of Proper Caulking
In any construction or maintenance project, proper caulking plays a vital role in ensuring the integrity and longevity of the structure. Caulk is used to seal joints, cracks, and gaps, preventing the entry of water, air, and pests. In the case of recreational vehicles (RVs), maintaining a watertight seal is especially crucial to avoid costly water damage and keep the interior safe and dry.
🧰 Materials Needed
Before starting the caulking process, gather the following materials:
- Caulk (recommended: 3M Marine Adhesive Sealant)
- Caulk gun (preferably drip-free)
- Mineral spirits
- Terry cloth towel
- Disposable gloves
- Plastic scrapers or pick set
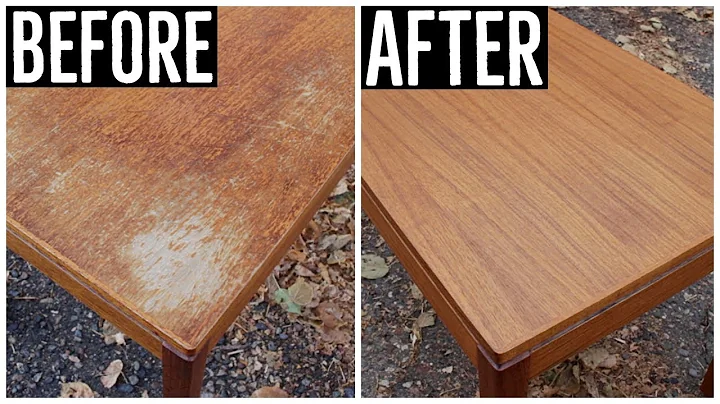
🛠️ Preparing the Surface
To achieve a successful caulk application, thorough surface preparation is essential. Begin by removing any loose or flaking old caulk using a plastic scraper or pick set. For stubborn residue, apply mineral spirits on a terry cloth and clean the area until it is free from dirt, gunk, and old caulk. Take extra care when working near delicate finishes to avoid any unintentional damage.
🔄 Removing Old Caulk
While some experts recommend removing all old caulk, it is not always necessary. If the existing caulk is in good condition, a thorough cleaning and recaulking can suffice. However, if there are areas with flaking or deteriorated caulk, use a plastic scraper or pick set to carefully remove them without scratching the surface.
🧼 Cleaning with Mineral Spirits
To ensure proper adhesion, clean the surface with mineral spirits. Apply a small amount onto a terry cloth towel and gently rub the area, removing any remaining residue. It is crucial to have a clean surface as it will enhance the bond between the caulk and the RV's exterior.
🏷️ Choosing the Right Caulk
When it comes to RV caulking, it is essential to select a high-quality product that is durable and resistant to UV rays. The 3M Marine Adhesive Sealant is recommended due to its medium-strength formula and rubbery texture when dry. This type of caulk provides excellent adhesion and helps prevent dirt and sand from sticking to the surface.
🖊️ Using a Drip-Free Caulk Gun
Investing in a drip-free caulking gun is highly recommended, as it eliminates the hassle and mess associated with traditional guns. The drip-free mechanism ensures precise control and prevents excess caulk from oozing out, leading to a cleaner and more efficient application process.
📝 Applying Caulk to Different Areas
Proper caulking involves addressing various areas of the RV to maintain a watertight seal. Here are the key areas to focus on:
1️⃣ Exterior Joints and Seams
Inspect the exterior joints and seams for any signs of separation or cracks. Apply a small bead of caulk along the affected areas, making sure not to overdo it. Use a terry cloth or your gloved finger to wipe away excess caulk, creating a neat and seamless finish.
2️⃣ Slide-Out Corners
Slide-outs are particularly susceptible to water damage, especially at the corners. Apply caulk along the top seam and the corners of the slide-outs to prevent water infiltration. Wipe away excess caulk to achieve a clean and watertight seal.
3️⃣ Furnace Vent Cracks
Inspect the furnace vent for any cracks or gaps, as these can allow water to penetrate the interior. Apply a thin bead of caulk along the cracks, ensuring complete coverage. Clean up any excess caulk for a professional-looking result.
4️⃣ Doors and Windows
Pay attention to the top portion of doors and windows, as these areas are prone to water intrusion. Apply a small amount of caulk along the seams, creating a barrier against moisture. Smooth out the caulk with a terry cloth or your gloved finger for a seamless finish.
5️⃣ Top of Slide-Outs
Examine the top of the slide-outs for any gaps or separation. Apply caulk along the entire top seam to prevent water from seeping in. It is crucial to ensure a complete seal to avoid leaks and subsequent water damage.
6️⃣ Fastener Heads
Check the fastener heads on the RV's exterior for potential gaps or areas of concern. Apply a small amount of caulk over the fasteners to provide an extra layer of protection against moisture. Smooth down the caulk for a clean and finished look.
7️⃣ Other Seams
Inspect other seams on the RV's exterior for any signs of separation or cracks. Apply caulk along these seams, ensuring proper coverage and adhesion. Use a terry cloth or your gloved finger to wipe away excess caulk, achieving a neat and tidy result.
👀 Inspecting and Maintaining Caulk
Regularly inspecting the condition of the caulk is crucial to catch any potential issues early on. Look for signs of cracking, separation, or damage, and address them promptly to maintain the integrity of the seal. Periodic recaulking may be necessary, especially in areas prone to wear and tear or extreme weather conditions.
💡 Conclusion
Proper caulking is essential for maintaining the integrity of your RV and preventing water damage. By following the steps outlined in this guide, you can confidently apply caulk to various areas of your RV, ensuring a watertight seal and peace of mind during your travels.
Highlights
- Proper caulking plays a vital role in ensuring the integrity and longevity of RVs.
- Thorough surface preparation and careful removal of old caulk are essential.
- Cleaning with mineral spirits and choosing the right caulk are key steps in the process.
- Using a drip-free caulking gun makes the application process cleaner and more efficient.
- Different areas, such as exterior joints, slide-out corners, and furnace vents, require specific attention during caulking.
- Regular inspection and maintenance of the caulked areas are necessary to prevent water damage.
FAQs
Q: How often should I recaulk my RV?
A: It is recommended to inspect the caulked areas at least once a year and recaulk as necessary. Pay attention to areas exposed to extreme weather conditions or areas prone to wear and tear.
Q: Can I apply new caulk over old caulk?
A: In most cases, it is possible to recaulk over old caulk as long as the existing caulk is in good condition. Thorough cleaning and proper adhesion are crucial for a successful application.
Q: How do I know if the caulk needs to be replaced?
A: Signs of cracking, separation, or damage to the caulk indicate the need for replacement. Regular inspections will help catch these issues early on and prevent water damage.
Q: Can I use any caulk for my RV?
A: It is recommended to use high-quality caulk specifically designed for RVs, such as the 3M Marine Adhesive Sealant. These caulks offer better durability and resistance to UV rays, ensuring a longer lifespan for your RV's seal.
Q: Is it necessary to wear gloves while caulking?
A: Wearing disposable gloves is highly recommended when working with caulk to protect your skin from the messy and potentially irritating product. It also makes clean-up easier.
Resources: