Simplified Setup for the Clare Video Doorbell
Table of Contents
- Introduction
- Setting up the Claire Video Doorbell
- Verify wireless network compatibility
- Download the Claire Vision Plus app
- Connect the doorbell to the network
- Generate a QR code for setup
- Activate the doorbell
- Configure notifications and rename the doorbell
- Accessing the doorbell remotely
- Conclusion
🚪 Setting Up the Improved Claire Video Doorbell
The Claire Video Doorbell is a modern and convenient device that enhances security and provides peace of mind. With its improved installment process, setting up the doorbell has never been easier. In this article, we will guide you through the step-by-step process of setting up your Claire Video Doorbell and accessing it remotely.
1️⃣ Verify wireless network compatibility
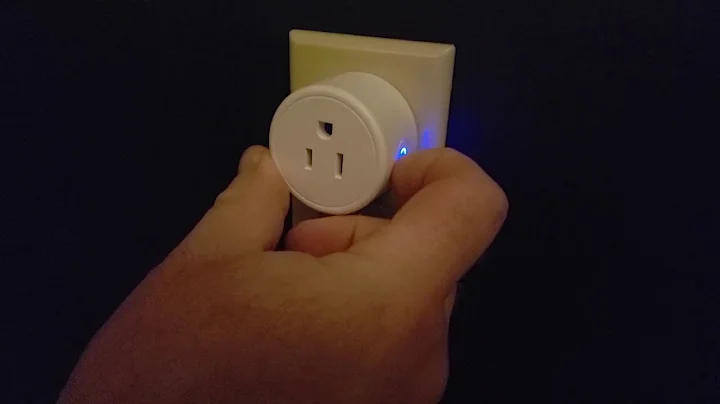
Before proceeding with the setup, it is crucial to ensure that your wireless network is compatible with the Claire Video Doorbell. The doorbell operates on a 2.4 gigahertz wireless network, so make sure your router supports this frequency. If needed, you can install a Wi-Fi extender to enhance the wireless signal in the doorbell's vicinity.
2️⃣ Download the Claire Vision Plus app
To begin the setup process, download the latest version of the Claire Vision Plus app from the App Store or Google Play Store. Install the app on your mobile device, ensuring that you have a stable internet connection.
3️⃣ Connect the doorbell to the network
Open the Claire Vision Plus app and log in using your registered credentials. Once logged in, navigate to the "Add Device" section by clicking the device icon on the top of the screen. Choose the "Video Doorbell" option to proceed.
4️⃣ Generate a QR code for setup
To establish a connection between your phone and the doorbell, the app will generate a unique QR code. Hold your phone's screen with the generated QR code in front of the doorbell lens. When the doorbell reads the QR code successfully, an audible alert will confirm the connection.
5️⃣ Activate the doorbell
Next, enter the password for your Wi-Fi extender or 2.4 gigahertz wireless network. Click the "Next" button to proceed. The app will confirm the successful connection to the Wi-Fi network, ensuring a stable connection between the doorbell and your network.
6️⃣ Configure notifications and rename the doorbell
Once the doorbell is activated, you have the option to customize its settings. You can enable or disable push notifications, allowing you to receive alerts when someone rings the doorbell. Additionally, you can rename the doorbell to personalize its identification.
📲 Accessing the Doorbell Remotely
After the setup is complete, you can conveniently access the Claire Video Doorbell both locally and remotely. Simply open the Claire Vision Plus app and click on the doorbell icon. This will provide you with a live feed from the doorbell's camera, allowing you to see and interact with visitors from anywhere.
🔒 Conclusion
The improved installation process of the Claire Video Doorbell ensures hassle-free setup and seamless connectivity. By following the step-by-step guide provided in this article, you can easily connect and configure your doorbell. Enjoy the convenience and security that the Claire Video Doorbell brings to your home. Stay tuned for more exciting updates and features.