Step-by-Step Guide: Replace Inner Fender Liner on Toyota Highlander
Table of Contents:
- Introduction
- Tools Required
- Step 1: Removing the Lug Nuts and Wheel
- Step 2: Removing the Splash Guard Molding
- Step 3: Removing the Inner Fender Liner
- Step 4: Removing the Wheel Arch
- Step 5: Installing the New Inner Fender Liner
- Step 6: Reattaching the Wheel Arch
- Step 7: Installing the Splash Guard Molding
- Step 8: Reattaching the Wheel and Lug Nuts
- Conclusion
How to Replace the Inner Fender Liner on a Toyota Highlander
Replacing the inner fender liner on a Toyota Highlander may seem like a daunting task, but with the right tools and step-by-step instructions, it can be easily accomplished. In this article, we will guide you through the process of replacing the inner fender liner, ensuring a smooth and successful repair.
Introduction
The inner fender liner on a Toyota Highlander plays a crucial role in protecting the wheel well and other vital components from dirt, debris, and moisture. Over time, it may become damaged or worn out, requiring replacement. By following the steps outlined in this guide, you will be able to remove the old inner fender liner and install a new one, ensuring the continued protection of your vehicle.
Tools Required
Before starting the replacement process, make sure you have the following tools handy:
- 21 millimeter socket
- 10 millimeter socket
- Clip pliers
- Flat blade screwdriver or trim tool
Step 1: Removing the Lug Nuts and Wheel
The first step in replacing the inner fender liner is to remove the lug nuts and wheel. Start by using a 21 millimeter socket to remove the five lug nuts. Once the lug nuts are removed, take off the wheel and set it aside in a safe place.
Step 2: Removing the Splash Guard Molding
Next, using a 10 millimeter socket, remove the two bolts on the splash guard molding. There is also one clip at the bottom that needs to be removed using a pair of clip pliers. Carefully remove the clip and then take off the splash guard molding.
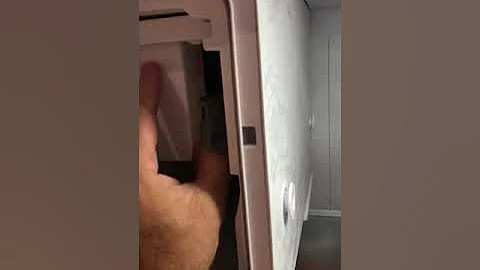
Step 3: Removing the Inner Fender Liner
Now it's time to remove the inner fender liner. Start by using a 10 millimeter socket to remove the bolt on the bottom of the liner. Then, go around the wheel well and remove all the 10 millimeter bolts. Some of these bolts may be hidden, so make sure to thoroughly check the entire area. Use clip pliers to remove any clips that hold the liner in place. Once all the bolts and clips are removed, the inner fender liner should be ready to come out. Start at the front and carefully pull the liner out.
Step 4: Removing the Wheel Arch
To access the inner fender liner, the wheel arch needs to be removed. There are clips and double-sided tape holding it in place. There are two styles of clips, one on the back side of the fender and the other on the rest of them. Use a pair of pliers to squeeze and push them out from the front. Remove the clips and then start to pop the wheel arch off.
Step 5: Installing the New Inner Fender Liner
Once the old inner fender liner and wheel arch are removed, it's time to install the new inner fender liner. Line up the two clips and push them in. Start by putting one bolt in the back and another in the top left. Make sure all the necessary parts are positioned correctly, and then secure them in place using bolts and clips. Pay attention to the specific locations mentioned earlier.
Step 6: Reattaching the Wheel Arch
After installing the inner fender liner, it's time to reattach the wheel arch. There is one clip that goes under it, and then the clips on the rest of the arch need to be aligned and pushed in. Make sure the inner fender liner is properly positioned inside the front bumper. Secure the wheel arch in place by tightening the 10 millimeter screws. Double-check that all the bolts and screws are securely tightened.
Step 7: Installing the Splash Guard Molding
Now, it's time to install the splash guard molding. Put it back in place and secure it using the two 10 millimeter screws. Additionally, there is one more clip that needs to be installed under the molding. After all the parts are in place, go around the wheel arch and tighten down all the 10 millimeter screws.
Step 8: Reattaching the Wheel and Lug Nuts
With the inner fender liner, wheel arch, and splash guard molding securely in place, it's time to reattach the wheel. Line up the lug nut holes and install the five lug nuts. Snug them down in a star pattern to ensure they are square. Once the car is back on the ground, use a torque wrench and a 21 millimeter socket to torque the lug nuts to 76 foot-pounds in a star pattern. Double-check that the lug nuts are properly tightened and secure.
Conclusion
By following these step-by-step instructions, you will be able to successfully replace the inner fender liner on your Toyota Highlander. It's important to take your time and ensure that all the parts are properly aligned and secured. With the new inner fender liner in place, your vehicle will be protected from dirt, debris, and moisture, ensuring its longevity and optimal performance.
⭐ Highlights:
- Learn how to replace the inner fender liner on a Toyota Highlander
- Step-by-step instructions with detailed illustrations
- Ensure the continued protection of your vehicle's wheel well and vital components
- Use common tools such as sockets and clip pliers
- Properly align and secure the new inner fender liner for optimal performance
FAQ:
Q: How often should the inner fender liner be replaced?
A: The frequency of replacing the inner fender liner depends on various factors such as driving conditions and maintenance. However, if it becomes damaged or worn out, it is recommended to replace it as soon as possible to maintain the protection of your vehicle's wheel well and components.
Q: Can I replace the inner fender liner myself or should I take it to a professional?
A: Replacing the inner fender liner can be done by a DIY enthusiast with basic mechanical skills. However, if you are unsure or uncomfortable performing the task yourself, it is always recommended to seek professional assistance to ensure the job is done correctly.
Q: Where can I purchase a new inner fender liner for my Toyota Highlander?
A: Inner fender liners can be purchased from various auto parts stores or online retailers. Make sure to get the correct model and year-specific liner for your Toyota Highlander.
Resources: