Transform Your Livestock Trough into a Stunning Summer Pond
Table of Contents
- Introduction
- Preparing the Livestock Trough
- Cleaning the Metal
- Applying Self-Etching Primer
- Applying Pond Shield Epoxy Paint
- Checking the Progress
- Shopping for Plants
- Arranging the Plants
- Setting up the Sponge Filter
- Seeding the Pond with Bacteria
- Finalizing the Pond
- Adding Fish
- Conclusion
🌊 Turning a Plain Livestock Trough into a Beautiful Summer Pond
Turning a simple metal livestock trough into a stunning summer pond can bring a touch of nature and relaxation to any outdoor space. In this article, we will explore the step-by-step process of transforming a plain trough into a vibrant fish-filled oasis. From preparing the trough to adding plants and fish, we will cover everything you need to know to create your own little piece of paradise.
1. Introduction
Are you someone who values creativity and enjoys DIY projects? If so, you'll love the idea of transforming a plain metal livestock trough into a beautiful summer pond. While it may seem unusual to receive a trough as a birthday gift, it opens the door to endless possibilities for creating a unique and personalized pond. In this guide, we will walk you through the process of turning a simple trough into a stunning fish pond that will be the envy of all your friends.
2. Preparing the Livestock Trough
Cleaning the Metal
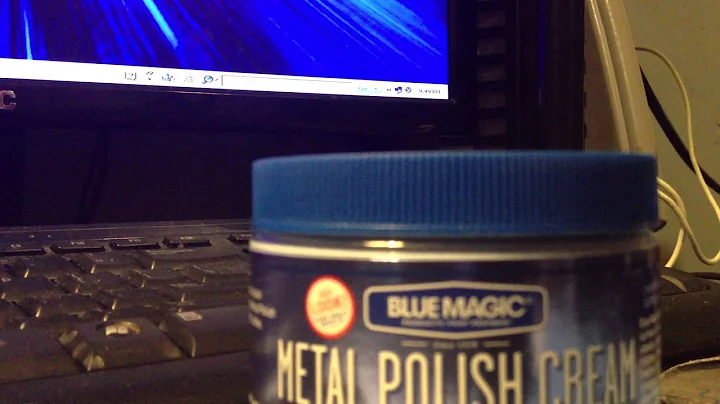
Before starting any modifications, it's important to thoroughly clean the metal trough. Begin by scrubbing it down with hot water and soap to remove any dirt, grease, or oil. This step is crucial to ensure proper adhesion of the materials used to transform the inside of the pond. For an extra thorough clean, swipe some acetone over the surface to get rid of any remaining oil. Take caution when using acetone, as it is a strong and fumey substance.
Applying Self-Etching Primer
Next, apply a special self-etching primer specifically designed for metals, such as galvanized metal. This primer acts as a base coat and enhances the adhesion of the epoxy paint that will be applied later. Using a paintbrush, coat the inside of the trough with the self-etching primer, following the instructions provided by the manufacturer.
Applying Pond Shield Epoxy Paint
The final step in preparing the trough is to apply Pond Shield, a two-part epoxy paint commonly used for pond coatings. This non-toxic paint provides a durable and waterproof seal, perfect for creating a safe and beautiful habitat for fish and plants. Prepare the epoxy by thoroughly mixing the two parts together. Working quickly, apply the epoxy to the inside of the trough using a paintbrush, ensuring full coverage. Pay attention to any areas that may require an additional coat for a smooth finish.
3. Checking the Progress
Allow the epoxy paint to cure for at least 24 hours before inspecting the pond. Look closely for any spots that may require touch-ups or additional coating. Scrape off any soft or sticky spots, sand the area, and apply another coat of epoxy as needed. By ensuring a thorough and even coating, you can guarantee a long-lasting and visually pleasing pond.
4. Shopping for Plants
With the pond prepared, it's time to add some greenery. Visit your local pond store or garden center to select aquatic plants that are suitable for your climate and pond size. Consider adding plants like Lavender Musk, Miniature Spearwort, Water Forget-Me-Nots, and Blue-Eyed Grass for a vibrant and diverse pond ecosystem. Ensure that the plants you choose are suitable for underwater applications and will thrive in the conditions of your pond.
5. Arranging the Plants
Take some time to carefully arrange the plants within your pond, considering their growth habits and aesthetic appeal. Create depth and dimension by placing taller plants towards the back and shorter plants towards the front. Use cinder blocks or other decorative elements to vary the heights and create visually appealing compositions. Remember to leave enough space for the fish to swim and explore.
6. Setting up the Sponge Filter
To maintain a healthy and balanced pond ecosystem, it's essential to set up a filtration system. A sponge filter is an effective and low-maintenance option for small ponds. Install the sponge filter according to the manufacturer's instructions, ensuring proper water circulation and oxygenation. Additionally, seed the pond with beneficial bacteria, such as Florin Bacter, to accelerate the nitrogen cycle and promote a stable and thriving environment for fish and plants.
7. Seeding the Pond with Bacteria
To establish a healthy biological filter, introduce beneficial bacteria to the pond. Use a product like Florin Bacter, which contains a blend of strains specifically designed to break down organic waste and prevent harmful ammonia and nitrate buildup. Follow the package instructions for dosing and continue to monitor water parameters to ensure a balanced ecosystem.
8. Finalizing the Pond
Inspect the pond periodically and make any necessary adjustments or additions to maintain its optimal condition. Take note of any areas that may require further coating with epoxy paint or any plants that need pruning or replanting. By continuously caring for your pond, you can ensure its longevity and beauty for years to come.
9. Adding Fish
Once the pond has established a stable ecosystem and the water parameters are suitable, it's time to introduce fish. Select fish species that are appropriate for the size and conditions of your pond. Consider colorful and low-maintenance options like goldfish, koi, or guppies. Before adding fish, acclimate them to the water temperature by floating their bag in the pond and gradually introducing pond water over the course of 20-30 minutes. Release the fish gently and observe their behavior to ensure they adapt well to their new home.
10. Conclusion
Congratulations on transforming a plain metal livestock trough into a beautiful summer pond! By following the steps outlined in this guide, you have created a charming and tranquil oasis. Enjoy the beauty of your pond as the plants flourish and fish gracefully swim through the crystal-clear water. Remember to maintain the pond regularly, monitor water quality, and provide proper care for the plants and fish. With proper attention, your summer pond will bring you endless joy and relaxation for years to come.
Highlights
- Transforming a plain metal livestock trough into a stunning summer pond
- Thoroughly cleaning the metal trough and removing any oil or grease
- Applying self-etching primer to enhance adhesion of the coating materials
- Using Pond Shield epoxy paint to create a waterproof and durable seal
- Shopping for aquatic plants suitable for the pond's climate and size
- Arranging the plants strategically for aesthetic appeal and balance
- Setting up a sponge filter for proper water circulation and oxygenation
- Seeding the pond with beneficial bacteria for a healthy ecosystem
- Regularly inspecting and maintaining the pond's condition
- Introducing suitable fish species and acclimating them to the water
- Enjoying the beauty and tranquility of your own summer pond
FAQ
Q: How long does the epoxy paint take to cure completely?
A: The epoxy paint typically takes around 24 hours to cure, but it is recommended to wait 48-72 hours before adding fish to the pond.
Q: Can I use any type of plant in the pond?
A: It's important to choose aquatic plants that are suitable for your specific climate and pond conditions. Consult with experts at your local pond store or garden center to ensure you select plants that will thrive in your pond.
Q: What type of fish should I add to my pond?
A: Common fish species for ponds include goldfish, koi, and guppies. Choose fish that are compatible with the size and conditions of your pond, and ensure they are properly acclimated before releasing them.
Q: How often should I clean and maintain the pond?
A: Regular maintenance is crucial to keep the pond clean and healthy. Perform routine checks, remove debris, monitor water parameters, and clean or replace the sponge filter as needed.