Réparer une chaise à bascule planeuse
Table of Contents
- Introduction
- Fixing the Glider Rocker
- Gathering the necessary tools and materials
- Assessing the damage
- Repairing the bearings
- Addressing other issues with the rocker
- Creating a New Part
- Finding a suitable replacement
- Measuring and marking the new holes
- Drilling and tapping the new part
- Strengthening the Joint
- Adding reinforcement if necessary
- Ensuring a strong and sturdy connection
- Final Touches
- Matching the color of the repaired part
- Adding finishing touches
- Conclusion
🪑 Fixing a Glider Rocker: Restoring Comfort and Functionality 🛠️
Are you the kind of person who sees potential in discarded items? Perhaps you're an avid DIY enthusiast, always on the lookout for a new project. Well, you're in luck because today, we're going to show you how to fix a glider rocker and restore it to its former glory. Whether you found this rocker on the curb or it's been hiding in your attic, we'll guide you through the process of repairing it step by step. So, roll up your sleeves, grab your tools, and let's get started!
1. Gathering the necessary tools and materials
Before we dive into the repairs, let's make sure we have everything we need. Here's a list of tools and materials you'll require for this project:
- Wrench or pliers
- Oil or lubricant
- Drill and drill bits
- Caliper
- Square
- Chisel
- Belt grinder
- Carriage bolt
- Nut
- Sandpaper
- Wood glue
- Paint or stain (optional)
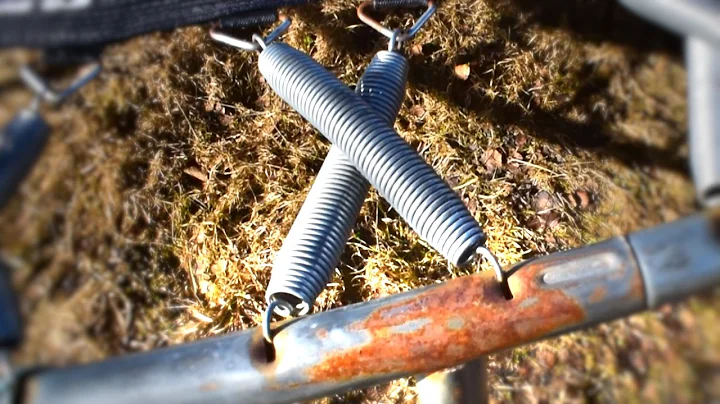
2. Assessing the damage
Now that you have your tools ready, let's take a closer look at the glider rocker. Check for any visible damage, such as crooked parts or signs of previous repairs. Pay special attention to the bearings, as they are crucial for smooth gliding motion. If you notice any issues, don't worry; we'll address them shortly.
3. Repairing the bearings
To fix the problem with the bearings, start by applying oil or lubricant to lubricate and loosen them. This should improve their functionality. However, if any bearings are completely worn out or damaged, they might need to be replaced. You can do this by removing the old bearings and replacing them with new ones. Once the new bearings are in place, ensure they are securely tightened to avoid any wobbling or instability.
Pros:
- Easy to oil and lubricate the bearings
- Simple replacement process for damaged bearings
- Improved functionality and smoother gliding motion
Cons:
- May require purchasing new bearings if damaged
4. Addressing other issues with the rocker
Apart from the bearings, there might be other minor issues with the rocker that need attention. Check for loose or missing screws and tighten or replace them as necessary. Additionally, if you notice any parts that are bent or misaligned, take the opportunity to straighten them out. By fixing these small issues, you'll ensure the rocker is more stable and comfortable to use.
5. Creating a New Part
In some cases, you may encounter a part of the rocker that is beyond repair. Rather than giving up on the project, let's learn how to create a new part from scratch. Start by assessing the size and dimensions of the damaged area. Look for suitable materials in your inventory or local hardware store that will match or complement the existing rocker.
Pros:
- Opportunity to customize and improve the rocker
- Ability to salvage materials from existing inventory
- Greater control over the strength and durability of the new part
Cons:
- Requires additional time and effort
- May require purchasing materials if not readily available
6. Measuring and marking the new holes
Once you have the materials ready, it's time to measure and mark the new holes for the replacement part. Use a caliper and square to ensure precise measurements. Transfer the positions of the old holes onto the new material, ensuring they are evenly spaced and aligned. This will guarantee a seamless fit and proper functionality once the part is installed.
7. Drilling and tapping the new part
With the new part marked, it's time to drill the holes. Start by drilling pilot holes using a drill bit appropriate for the size of the screws or bolts you'll be using. This will prevent the wood from splitting. Once the pilot holes are drilled, use a tap to create threads inside the holes. This will allow the screws or bolts to securely fasten the new part in place.
8. Strengthening the Joint
To ensure a strong and sturdy joint, consider adding reinforcement to the connection between the new part and the existing rocker. This can be achieved by using additional screws, brackets, or even wood glue. Reinforcement will provide extra support, making the repaired rocker more resilient and durable.
9. Final Touches
Now that the repairs are complete, it's time to give your glider rocker a finished look. If the new part doesn't match the color of the existing rocker, you can paint or stain it to match. Sand down any rough edges or imperfections and apply a protective coat of finish to enhance the longevity of the rocker. These final touches will not only make your creation visually appealing but also contribute to its overall protection and durability.
10. Conclusion
Congratulations! You have successfully fixed your glider rocker and transformed it into a functional and comfortable piece of furniture once again. By following the steps outlined in this guide, you've proven that with a little bit of effort and creativity, even discarded items can be given a new lease on life. So take a seat, relax, and enjoy the soothing gliding motion of your restored rocker.
Highlights:
- Fixing a glider rocker from curb to comfort
- Repairing and replacing bearings for smoother gliding motion
- Creating a new part using suitable materials
- Ensuring a strong and sturdy joint for durability
- Adding final touches for aesthetics and protection
FAQ
Q: Can I fix a glider rocker if I don't have experience in DIY projects?
A: While some repairs may require basic DIY skills, fixing a glider rocker can be achieved with patience and the right tools. Follow the step-by-step instructions, and don't hesitate to seek assistance if needed.
Q: Where can I find replacement bearings for my glider rocker?
A: You can find replacement bearings at your local hardware store or online. Be sure to measure the size and specifications of the original bearings to ensure a proper fit.
Q: Can I paint the repaired part of the glider rocker a different color?
A: Absolutely! Painting the repaired part a different color is a great way to customize your glider rocker and make it uniquely yours.
Resources:
 AI SEO Assistant


 WHY YOU SHOULD CHOOSE Proseoai