Build a Shopping Cart Using JavaScript | Step-by-Step Tutorial
Table of Contents:
- Introduction
- Building a Shopping Cart Using JavaScript
- Preview of the Final Project
- Downloading the Starter Template
- Rendering Products
- Adding Products to the Cart
- Changing the Number of Units
- Updating the Subtotal
- Removing Items from the Cart
- Saving the Cart to Local Storage
- Conclusion
Introduction
In this tutorial, we will learn how to build a shopping cart using JavaScript. We will cover various aspects such as rendering products, adding products to the cart, changing the number of units, updating the subtotal, removing items from the cart, and saving the cart to local storage. By the end of this tutorial, you will have a fully functional shopping cart that can be used in your own projects.
Building a Shopping Cart Using JavaScript
Building a shopping cart requires a combination of HTML, CSS, and JavaScript. We will utilize JavaScript to handle the logic of adding and removing items from the cart, while HTML and CSS will handle the visual aspect of displaying the cart. We will also utilize local storage to save the cart so that it persists even when the page is refreshed.
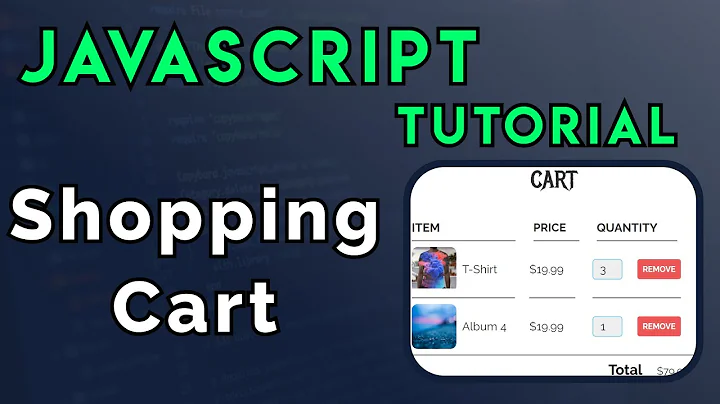
Preview of the Final Project
Before we dive into the implementation details, let's take a quick look at the final project. The shopping cart will display a list of products that can be added to the cart. Each product will have a button to add it to the cart, as well as buttons to increment or decrement the number of units. The cart will display the number of items and the total price. Items can be removed from the cart by clicking on them.
Downloading the Starter Template
To get started, we need to download the starter template. The starter template contains all the necessary files and code to build our shopping cart. You can find the download link in the description of this tutorial. Once you've downloaded the zip file, extract it to your desired location. The main files we will be working with are app.js for the JavaScript logic, index.html for the HTML structure, and styles.css for the CSS styling.
Rendering Products
To render the products, we need to first select the element in our HTML where we want to render them. In our case, we will use a div with the class name "products". We can select this element using JavaScript and save it to a constant called productsElement. Next, we will create a function called renderProducts that takes in the products array as an argument. Within this function, we will use a forEach loop to iterate over each product in the array. For each product, we will use a template literal to generate the HTML markup for a single product and append it to the productsElement. Finally, we will invoke the renderProducts function and pass in the products array to display the products on the page.
Adding Products to the Cart
To add products to the cart, we will use the "onclick" event on the add to cart button. Instead of adding an event listener, we can directly call a function called addToCart and pass in the product id as an argument. In the addToCart function, we will find the product with the matching id from the products array and push it to a new array called cart. If the product already exists in the cart, we will increment the number of units by one. After adding the product to the cart, we will update the cart and render the cart items and subtotal.
Changing the Number of Units
To change the number of units in the cart, we will use "onclick" events on the plus and minus buttons. When the plus button is clicked, we will call a function called changeNumberOfUnits and pass in the action as "plus" and the item id. In the changeNumberOfUnits function, we will use the map method on the cart array to increment or decrement the number of units based on the action. We will then update the cart and render the cart items and subtotal.
Updating the Subtotal
To update the subtotal, we need to calculate the total number of items in the cart and the total price. We can use a forEach loop on the cart array to calculate the sum of the number of units and the total price by multiplying the unit price by the number of units for each item. Once we have these values, we can update the corresponding elements in the HTML to display the updated subtotal.
Removing Items from the Cart
To remove items from the cart, we will add an "onclick" event to each item in the cart. When an item is clicked, we will call a function called removeItemFromCart and pass in the item id. In the removeItemFromCart function, we will use the filter method on the cart array to remove the item with the matching id. We will then update the cart and render the cart items and subtotal.
Saving the Cart to Local Storage
To save the cart to local storage, we will use the localStorage.setItem method and pass in a key-value pair. The key will be "cart" and the value will be the stringified version of the cart array using JSON.stringify. This will allow us to retrieve the cart from local storage and render the cart items even after refreshing the page. To retrieve the cart from local storage, we can use the localStorage.getItem method and parse the JSON string back into an array using JSON.parse.
Conclusion
Congratulations! You have successfully built a shopping cart using JavaScript. We covered various aspects such as rendering products, adding products to the cart, changing the number of units, updating the subtotal, removing items from the cart, and saving the cart to local storage. You can now apply this knowledge to implement shopping carts in your own projects. Don't forget to subscribe and like the video to support us and stay updated with our latest tutorials.